This article provides a comprehensive step-by-step guide on changing the headlight bulb in a Honda Accord, ensuring safe and effective replacement for optimal visibility on the road. Properly functioning headlights are crucial for safe driving, especially during nighttime or adverse weather conditions.
Understanding the importance of replacing headlight bulbs is crucial for safety and visibility. Dimming lights can be a hazard, making timely replacement essential for safe driving. Headlights are your primary source of illumination, and they ensure that you can see and be seen by other drivers.
Recognizing the signs that indicate a headlight bulb needs replacement can help prevent driving hazards. Look for:
- Flickering lights
- Dimness
- Complete failure
These indicators signal that it’s time to replace the bulb before it affects your visibility.
Gathering the right tools before starting the replacement process can save time and frustration. Common tools needed include:
- Gloves (to avoid oil from your hands on the bulb)
- Screwdriver (for removing any necessary covers)
- Replacement bulb (make sure it’s the correct type)
Choosing the right bulb type for your Honda Accord is essential for compatibility. Refer to your vehicle’s manual or the existing bulb for specifications and recommendations. Typically, Honda Accords use H11 or 9006 bulbs, but it’s always best to double-check.
Following a systematic process ensures a successful headlight bulb replacement. Here’s how to do it:
Gaining access to the headlight assembly is the first step in the replacement process. This may involve:
- Opening the hood of your vehicle.
- Removing the plastic cover or any components obstructing access.
Carefully removing the old bulb is crucial to avoid damage to the headlight assembly. Follow these steps:
- Disconnect the electrical connector.
- Twist the bulb counterclockwise to remove it.
Proper installation of the new bulb is vital for functionality and longevity. Make sure to:
- Handle the new bulb with gloves to keep it clean.
- Insert the bulb into the socket and twist it clockwise to secure it.
After installation, testing the new headlight bulb is essential to confirm it is functioning correctly. Turn on your vehicle and check:
- If the new bulb illuminates.
- If the beam is properly aligned.
Avoiding common pitfalls can make the replacement process smoother and more effective. Here are some frequent errors:
- Touching the bulb with bare hands.
- Forgetting to test the new bulb.
- Not securing the bulb properly.
Regular maintenance can extend the life of your headlight bulbs. Here are some practical tips:
- Clean the headlight lens regularly to avoid cloudiness.
- Check the alignment of your headlights to ensure optimal performance.
- Replace both bulbs at the same time for even lighting.

Why Change Your Honda Accord Headlight Bulb?
When it comes to ensuring your vehicle’s safety and performance, changing your Honda Accord headlight bulb is an essential task that should not be overlooked. Headlights are crucial for visibility during nighttime driving and adverse weather conditions. A malfunctioning headlight can significantly impair your ability to see the road and be seen by other drivers, leading to potential accidents.
Understanding the importance of replacing headlight bulbs is crucial for safety and visibility. Dimming lights can be a hazard, making timely replacement essential for safe driving. Here are several key reasons why you should prioritize this maintenance task:
- Enhanced Visibility: Bright headlights illuminate the road effectively, allowing you to spot obstacles, pedestrians, and road signs well in advance.
- Increased Safety: Driving with dim or non-functioning headlights increases the risk of accidents. Other drivers may not see you, especially in low-light conditions.
- Legal Compliance: Many regions have regulations requiring functional headlights. Driving with faulty lights can lead to fines or legal issues.
- Improved Aesthetics: New headlights can enhance the overall appearance of your vehicle, giving it a fresher and more polished look.
- Cost-Effective Maintenance: Replacing a headlight bulb is generally an inexpensive repair compared to the costs associated with accidents caused by poor visibility.
Recognizing the signs that indicate a headlight bulb needs replacement can help prevent driving hazards. Look for:
- Flickering Lights: If your headlights flicker on and off, it’s a sign that the bulb may be failing.
- Dimness: Noticeably dim headlights can indicate that the bulb is nearing the end of its lifespan.
- Complete Failure: If one or both headlights are not functioning at all, it’s time for a replacement.
Before starting the replacement process, gathering the right tools can save time and frustration. Common tools needed include:
- Gloves: To protect your hands and avoid touching the bulb with bare skin.
- Screwdriver: Depending on your model, you may need a screwdriver to access the headlight assembly.
- Replacement Bulb: Ensure you have the correct bulb type for your Honda Accord.
Choosing the right bulb type for your Honda Accord is essential for compatibility. Refer to your vehicle’s manual or the existing bulb for specifications and recommendations. This ensures that you purchase a bulb that fits perfectly and functions optimally.
Following a systematic process ensures a successful headlight bulb replacement. Here’s how to do it:
- Accessing the Headlight Assembly: Open the hood and locate the headlight assembly. You may need to remove a cover or adjust components to reach the bulb.
- Removing the Old Bulb: Carefully extract the old bulb, following best practices to avoid damaging the headlight assembly.
- Installing the New Headlight Bulb: Insert the new bulb securely and ensure it is aligned correctly to avoid future issues.
- Testing the New Headlight Bulb: After installation, test the new bulb to confirm it is functioning correctly.
Avoiding common pitfalls can make the replacement process smoother and more effective. Here are some frequent errors:
- Touching the Bulb: Avoid touching the glass part of the bulb with your fingers, as oils can reduce its lifespan.
- Forgetting to Test: Always test the new bulb before closing the hood to ensure it works properly.
Regular maintenance can extend the life of your headlight bulbs. Here are some practical tips:
- Clean Headlight Lenses: Regularly clean the headlight lenses to ensure maximum light output.
- Check Alignment: Ensure that your headlights are properly aligned for optimal visibility.

When Should You Replace Your Headlight Bulb?
Recognizing the signs that indicate a headlight bulb needs replacement is crucial for maintaining safety on the road. Dimming lights, flickering, or complete failure can create hazardous driving conditions, making it essential to be vigilant about your vehicle’s lighting system.
Here are some key indicators that suggest it might be time to replace your headlight bulb:
- Flickering Lights: If you notice your headlights flickering while driving, this could be a sign of an impending failure. Flickering can indicate a loose connection or a bulb that is nearing the end of its life.
- Dimming Headlights: Headlights that appear dimmer than usual can compromise your visibility, especially during nighttime driving. This dimness can occur gradually, making it easy to overlook until it becomes a significant issue.
- Complete Failure: If one or both of your headlights fail entirely, it’s clear that replacement is necessary. Driving without functional headlights is not only dangerous but also illegal in many areas.
- Color Changes: If you notice a color change in your headlight output, such as a yellow or blue tint, it may be time for a replacement. Consistent color can be an indicator of bulb health.
Regularly inspecting your headlights can help you catch these signs early. It’s advisable to check your headlights at least once a month, especially before long trips or during seasonal changes when weather conditions can affect visibility.
Additionally, if you frequently drive in adverse conditions, such as heavy rain or fog, ensuring your headlights are in optimal condition is even more critical. Poor visibility can lead to accidents and increase the risk of collisions.
Replacing headlight bulbs is a relatively simple task that can often be done at home with minimal tools. However, if you’re unsure about the process, consulting a professional mechanic can ensure the job is done correctly and safely.
In summary, being proactive about monitoring your headlights for these signs can significantly enhance your safety while driving. Don’t wait for a complete failure to take action; regular maintenance and timely replacement are key to ensuring that your vehicle is always road-ready.
What Tools Do You Need for the Replacement?
When preparing to change the headlight bulb in your Honda Accord, it is essential to gather the right tools to ensure a smooth and efficient replacement process. Having everything you need on hand can significantly reduce the time spent on the task and minimize any potential frustration. Below is a comprehensive list of tools and materials that you should consider before you begin.
- Gloves: Wearing gloves is important to protect your hands from dirt and grease, as well as to avoid transferring oils from your skin onto the new bulb, which can cause it to fail prematurely.
- Screwdriver: A screwdriver is necessary for removing any screws or fasteners that may be securing the headlight assembly. Ensure you have the correct type, whether it’s a Phillips or flathead, depending on your vehicle’s design.
- Replacement Bulb: It is crucial to have the correct replacement bulb on hand. Refer to your vehicle’s manual or check the specifications of the existing bulb to ensure compatibility.
- Towel or Cloth: A clean towel or cloth can be useful for wiping down surfaces and ensuring that the area around the headlight is clean before installation.
- Flashlight: If you’re working in low-light conditions or at night, a flashlight can help illuminate the area, making it easier to see what you are doing.
Having the right tools at your disposal not only saves time but also ensures that the replacement process is carried out safely and effectively. Using inappropriate tools can lead to damage to the headlight assembly or the new bulb, resulting in additional costs and time spent on repairs. Furthermore, being organized and prepared allows you to focus on the task at hand without unnecessary interruptions.
In addition to the basic tools mentioned, you may also want to consider having the following items available:
- Safety Glasses: Protect your eyes from debris that may fall during the replacement process.
- Socket Wrench Set: Depending on your vehicle model, a socket wrench may be needed to remove certain components.
- Wire Brush: A wire brush can help clean any corrosion from the electrical contacts, ensuring a good connection for the new bulb.
Before you start the headlight bulb replacement process in your Honda Accord, take a moment to gather all the necessary tools. This preparation will not only enhance your efficiency but also contribute to a successful installation. By ensuring you have everything you need, you can avoid common pitfalls and enjoy the peace of mind that comes with knowing your vehicle is safe and road-ready.
How to Identify the Correct Bulb Type?
When it comes to maintaining your Honda Accord, one of the most critical aspects is ensuring that your headlights are functioning optimally. A common issue many drivers face is identifying the correct bulb type for replacement. This task is essential not only for compatibility but also for safety and visibility on the road. In this section, we will explore the best practices for identifying the right headlight bulb type for your Honda Accord.
Choosing the correct bulb type is crucial for several reasons. First and foremost, using the wrong bulb can lead to incompatibility issues, which may cause electrical problems or even damage your vehicle’s headlight assembly. Additionally, the right bulb ensures that you achieve optimal brightness, enhancing your visibility during nighttime driving or adverse weather conditions.
- Owner’s Manual: Your vehicle’s manual is a valuable resource that contains detailed specifications about the headlight bulb type required for your Honda Accord. Look for the section dedicated to lighting or electrical components.
- Existing Bulb: If you are replacing a burned-out bulb, examining the existing one can provide immediate information. Take note of the bulb’s size, shape, and any markings that indicate its type.
- Online Databases: Websites and forums dedicated to automotive maintenance often have comprehensive databases. You can search for your specific Honda Accord model and year to find recommendations.
- Auto Parts Stores: Many auto parts retailers have knowledgeable staff who can assist you in determining the correct bulb type based on your vehicle’s make and model.
Understanding the various types of headlight bulbs available can also aid in your selection process. The most common types include:
- Halogen Bulbs: These are the traditional bulbs found in many vehicles, providing a warm light and are relatively inexpensive.
- Xenon (HID) Bulbs: Known for their bright, white light, these bulbs are more energy-efficient and have a longer lifespan than halogen bulbs.
- LED Bulbs: Increasingly popular due to their longevity and energy efficiency, LED bulbs offer excellent visibility and a modern look.
Once you have gathered the necessary information, confirm the bulb type by cross-referencing it with multiple sources. This can include:
- Checking with your local dealership for OEM (Original Equipment Manufacturer) recommendations.
- Using online tools that allow you to input your vehicle’s details to find compatible parts.
- Consulting automotive forums where fellow Honda Accord owners share their experiences and recommendations.
In summary, identifying the correct bulb type for your Honda Accord is a straightforward yet vital task that can significantly impact your driving experience. By utilizing your vehicle’s manual, examining existing bulbs, and leveraging online resources, you can ensure that you select the right replacement bulb. This not only enhances your vehicle’s performance but also contributes to safer driving conditions.

Step-by-Step Guide to Changing the Bulb
Changing a headlight bulb in your Honda Accord may seem daunting, but by following a systematic process, you can ensure a successful replacement. This guide breaks down each step, making it easy to access the headlight assembly and secure the new bulb effectively.
To begin, it is essential to gather the necessary tools. You will need:
- Gloves – to protect your hands and the new bulb from oils.
- Screwdriver – typically a Phillips head, depending on your model.
- Replacement bulb – ensure it is the correct type for your Honda Accord.
Once you have your tools ready, follow these steps:
The first step is to access the headlight assembly. Open the hood of your vehicle and locate the headlight compartment. Depending on the model year, you may need to remove a plastic cover or other components to reach the bulb. Be careful not to force any parts, as they can be fragile.
After accessing the assembly, gently twist the old bulb counterclockwise to remove it. Avoid touching the glass portion of the bulb with your fingers, as the oils can shorten its lifespan. Instead, hold the bulb by its base. If it is stuck, give it a slight wiggle to free it.
Now it’s time to install the new bulb. Take your new bulb and align it with the socket. Insert it carefully and twist it clockwise until it is securely in place. Make sure it is properly seated to avoid any issues with functionality.
Before reassembling everything, it’s crucial to test the new bulb. Turn on your vehicle and switch on the headlights. Check to ensure the new bulb is illuminating correctly. If it doesn’t light up, double-check the connections and ensure the bulb is seated properly.
While changing the bulb, be mindful of common errors that can lead to problems. These include:
- Forgetting to wear gloves, which can lead to oil contamination.
- Not checking the compatibility of the new bulb.
- Forcing the bulb into the socket, which can damage the assembly.
To keep your headlights functioning optimally, consider the following maintenance tips:
- Regularly clean the headlight lenses to remove dirt and grime.
- Inspect the bulbs periodically for signs of wear.
- Avoid using high-wattage bulbs that can overheat and damage the assembly.
By following this step-by-step guide, you can confidently change the headlight bulb in your Honda Accord, ensuring better visibility and safety on the road.
Accessing the Headlight Assembly
Accessing the headlight assembly is a crucial step in the process of changing the headlight bulb in your Honda Accord. This initial phase sets the stage for a smooth and effective replacement. Understanding how to properly access the assembly can save you time and prevent unnecessary damage to your vehicle.
To begin, you will need to gather a few essential tools. Typically, a screwdriver and a pair of gloves are sufficient. It’s advisable to wear gloves to avoid getting oils from your skin on the new bulb, which can shorten its lifespan. Once you have your tools ready, you can proceed to the next steps.
The first task is to locate the headlight assembly cover. This cover is usually secured with screws or clips. Carefully inspect the area around the headlight for any visible screws. Using your screwdriver, gently remove these screws or unclip the cover. Be cautious during this process, as forcing the cover off can lead to cracks or damage.
In some cases, other components may obstruct your access to the headlight assembly. If you encounter such a situation, it’s essential to identify the components that need to be adjusted or removed. This could include parts like the battery or air intake duct. Consult your vehicle’s manual for guidance on safely maneuvering these components.
Once the cover is removed and any obstructing components are adjusted, you should have a clear view of the headlight bulb. At this point, it’s vital to handle everything with care. Gently grasp the bulb socket and twist it counterclockwise to release it from the assembly. Take your time to avoid any damage to the wiring or the assembly itself.
While accessing the headlight assembly, be on the lookout for any signs of damage. Cracked lenses or frayed wires can indicate previous issues that may need addressing before installing the new bulb. If you notice any damage, it’s advisable to consult a professional for assistance.
After successfully accessing the headlight assembly, take a moment to inspect the area for any dirt or debris. Cleaning this space can enhance the performance of your new bulb and ensure optimal visibility. Once everything is clear, you are ready to proceed with the removal of the old bulb and the installation of the new one.
In summary, accessing the headlight assembly may seem straightforward, but it requires careful attention to detail. By following the steps outlined above, you can ensure that you reach the bulb safely and effectively, setting yourself up for a successful headlight replacement.
Removing the Old Bulb
When it comes to changing the headlight bulb in your Honda Accord, is a critical step that requires careful attention. This process not only ensures that you can install the new bulb correctly but also prevents any potential damage to the headlight assembly. Here, we will explore the best practices for safely extracting the old bulb without causing harm.
Before you start, it’s essential to ensure that your vehicle is parked on a flat surface, and the engine is turned off. This will provide a safe environment to work in. Additionally, wearing gloves is recommended to protect your hands and to prevent oils from your skin from getting on the new bulb, which can cause it to burn out prematurely.
- Disconnect the Power Supply: Begin by disconnecting the power supply to the headlight. This usually involves unplugging the electrical connector attached to the bulb. Gently press the tab on the connector and pull it away. Be careful not to pull on the wires themselves.
- Remove the Bulb Retaining Clip: Most headlight bulbs are secured with a retaining clip. Carefully unclip or unscrew this component, ensuring you do not bend or break it. If you’re unsure, consult your vehicle’s manual for specific instructions related to your Honda Accord model.
- Extract the Old Bulb: With the retaining clip removed, you can now gently pull the old bulb straight out of the socket. Avoid twisting or forcing it, as this could damage the headlight assembly. If the bulb seems stuck, double-check that all retaining clips are fully released.
- Inspect the Socket: Once the old bulb is removed, take a moment to inspect the socket for any signs of corrosion or damage. If you notice any issues, it may be necessary to clean or replace the socket to ensure a good connection with the new bulb.
Why is Careful Removal Important? The headlight assembly is a delicate component of your vehicle. Mishandling the old bulb during removal can lead to scratches, cracks, or other forms of damage that may require costly repairs. By following the steps outlined above, you can minimize the risk of damaging your vehicle while ensuring a smooth transition to the new bulb.
In summary, the process of removing the old headlight bulb in your Honda Accord should be approached with care and precision. By disconnecting the power supply, removing the retaining clip, and gently extracting the bulb, you will set the stage for a successful installation of the new bulb. Taking the time to do this correctly will not only enhance your vehicle’s visibility on the road but also prolong the lifespan of your headlight assembly.

Installing the New Headlight Bulb
When it comes to ensuring your Honda Accord’s headlights function optimally, correctly is imperative. A proper installation not only enhances the functionality of your headlights but also significantly contributes to their longevity. This guide will walk you through the essential steps and considerations for a successful installation.
Proper installation of the headlight bulb is crucial for several reasons. First and foremost, a securely fitted bulb minimizes the risk of it becoming loose or misaligned while driving. If the bulb is not aligned correctly, it can lead to poor visibility, which can be dangerous during nighttime driving or adverse weather conditions. Additionally, an improperly installed bulb may cause electrical issues that could affect other components of your vehicle’s lighting system.
- Check Compatibility: Before beginning the installation, confirm that you have the correct bulb type for your Honda Accord. Refer to the vehicle’s manual or consult with an auto parts specialist.
- Prepare the Workspace: Ensure you are working in a clean, dry area with adequate lighting. This will help you see the components clearly and avoid losing small parts.
- Wear Gloves: To prevent oil from your fingers getting on the bulb, wear gloves. Oil can create hot spots on the bulb surface, leading to premature failure.
- Insert the New Bulb: Carefully align the new bulb with the socket. Gently push it into place until you hear a click, indicating it is securely fitted. Be cautious not to force it, as this could damage the bulb or the socket.
- Check Alignment: After installation, check to ensure that the bulb is properly aligned. Misalignment can not only reduce visibility but also cause the bulb to burn out more quickly.
Once the new bulb is installed, it’s essential to perform a few final checks:
- Test the Bulb: Turn on your headlights to ensure the new bulb is functioning properly. Check both low and high beams if applicable.
- Inspect for Secure Fit: Gently shake the bulb to ensure it is securely fitted and does not move.
- Check for Leaks: Inspect the headlight assembly for any signs of moisture or leaks, which could indicate improper sealing.
By following these steps, you can ensure that your new headlight bulb is installed correctly, providing you with optimal visibility and safety on the road. Remember, a well-installed bulb not only enhances your driving experience but also extends the life of your vehicle’s lighting system.
In conclusion, taking the time to install your new headlight bulb properly is a small investment that yields significant returns in safety and performance. Always prioritize safety and functionality by ensuring that your headlights are in top condition.
Testing the New Headlight Bulb
After successfully installing your new headlight bulb in your Honda Accord, it is crucial to ensure that it is functioning properly. Testing the bulb not only confirms that it is correctly installed but also guarantees your safety on the road. Here’s how to perform a simple yet effective test to check the operation of your new headlight bulb.
Testing your headlight bulb after installation is important for several reasons:
- Safety: Properly functioning headlights are essential for visibility during night driving or in poor weather conditions.
- Compliance: Many regions have regulations regarding vehicle lighting; ensuring your headlights work can help you avoid fines.
- Longevity: Testing can help identify any issues early, potentially extending the life of your new bulb.
Follow these simple steps to test your new headlight bulb:
- Turn On Your Vehicle: Start your Honda Accord and ensure it is in a safe, stationary position.
- Activate Headlights: Switch on your headlights using the control lever. Make sure to turn them on to the low beam setting.
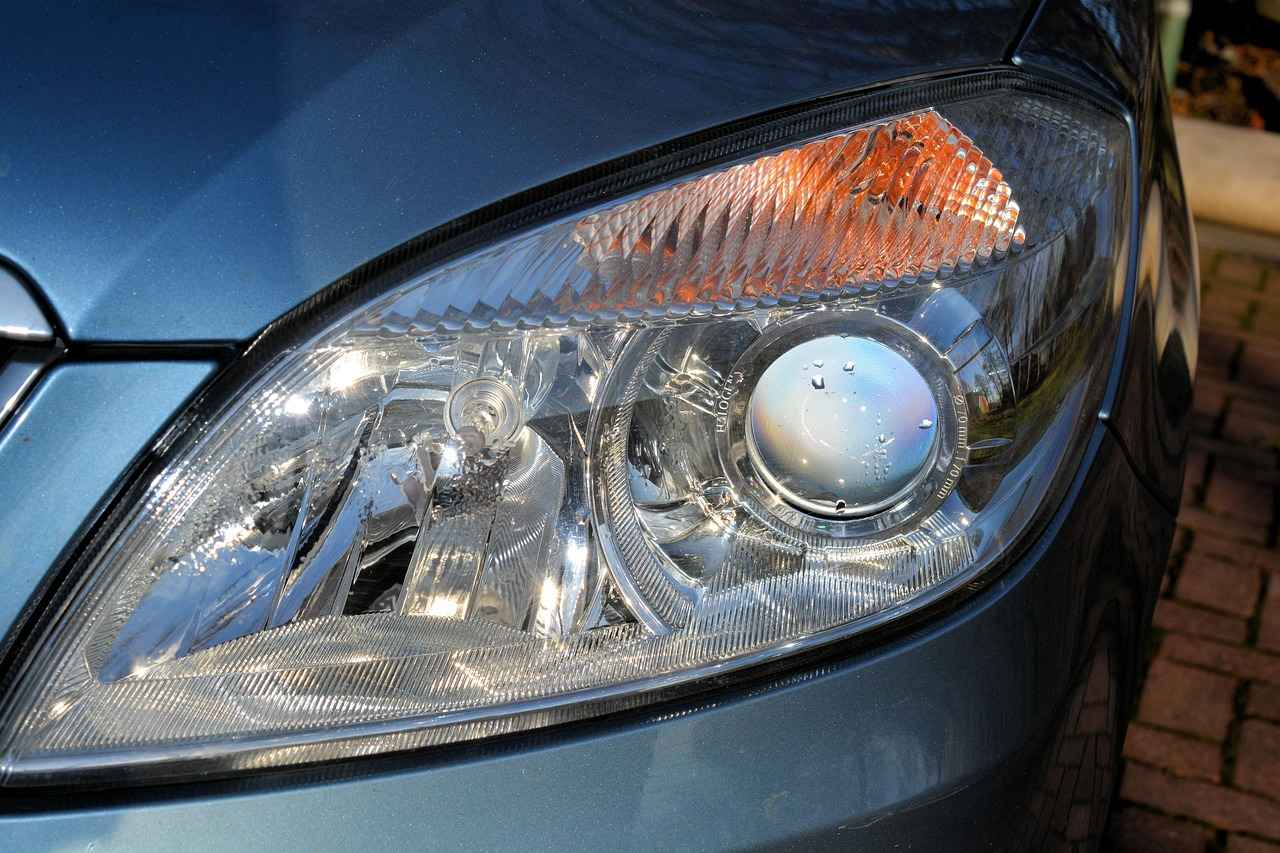
- Check for Brightness: Step outside the vehicle and observe the headlights. They should emit a bright, clear light. If one side is dim or flickering, there may be an issue with the installation.
- Check Alignment: Ensure that the headlights are correctly aligned. Misalignment can cause uneven light distribution, which is hazardous for both you and other drivers.
- Inspect for Flickering: If you notice any flickering, it may indicate a loose connection or a defective bulb. In this case, turn off the headlights and recheck the installation.
If your new headlight bulb does not work after testing, consider the following steps:
- Check Connections: Ensure that all wiring and connectors are securely attached and free from corrosion.
- Examine the Bulb: Remove the bulb and inspect it for any visible damage. If it appears faulty, replace it with a new one.
- Consult a Professional: If you are unable to resolve the issue, it may be best to consult a mechanic for further assistance.
By following these steps, you can ensure that your new headlight bulb is functioning correctly, enhancing your visibility and safety on the road. Remember, regular checks and maintenance can prevent future issues and keep your vehicle in top condition.

Common Mistakes to Avoid During Replacement
When it comes to changing the headlight bulb in your Honda Accord, avoiding common mistakes is key to ensuring a smooth and effective replacement process. Many car owners may overlook certain details, which can lead to frustration or even damage to the vehicle. This section will explore frequent errors made during the replacement and provide helpful tips on how to steer clear of them.
Replacing a headlight bulb may seem straightforward, but common pitfalls can complicate the task. Errors can lead to improper installation, reduced visibility, and even damage to the headlight assembly. By being aware of these mistakes, you can enhance your safety on the road and ensure your vehicle remains in optimal condition.
- Using the Wrong Bulb Type: Always double-check the specifications of the replacement bulb. Using an incorrect bulb can lead to compatibility issues and may even cause electrical problems.
- Neglecting to Wear Gloves: The oils from your fingers can damage the bulb, leading to premature failure. Always wear gloves or use a clean cloth when handling the new bulb.
- Forgetting to Disconnect the Battery: Safety should be your top priority. Disconnecting the battery prevents any electrical shorts or shocks while working on the headlight assembly.
- Not Securing the Bulb Properly: A loose bulb can lead to flickering lights or complete failure. Ensure that the bulb is firmly in place and properly aligned.
- Rushing the Process: Take your time during the replacement. Rushing can lead to mistakes that may require you to redo the work, wasting time and effort.
To achieve a successful headlight bulb replacement, follow these best practices:
1. Gather all necessary tools and materials before starting.2. Refer to your vehicle's manual for specific instructions and bulb specifications.3. Work in a well-lit area to clearly see what you are doing.4. Follow the step-by-step guide carefully to avoid missing any critical steps.5. After installation, test the new bulb to ensure it is functioning correctly.
If you face any challenges during the replacement process, don’t hesitate to consult a professional. Sometimes, seeking expert help can save you time and prevent further complications.
By being aware of these common mistakes and following the tips provided, you can confidently change the headlight bulb in your Honda Accord. This not only ensures your safety but also enhances your vehicle’s performance on the road.

Maintenance Tips for Headlight Longevity
Maintaining your headlights is crucial not only for safety but also for extending the lifespan of your headlight bulbs. Regular upkeep ensures that your headlights remain bright and functional, providing optimal visibility during nighttime driving or adverse weather conditions. Here are some practical tips to keep your headlights in top condition:
- Regular Cleaning: Dirt, grime, and road debris can accumulate on your headlights, leading to reduced brightness. Use a gentle cleanser or a mixture of vinegar and water to clean the lenses regularly. A soft cloth or sponge will help avoid scratches.
- Inspect for Damage: Periodically check your headlights for any signs of damage, such as cracks or fogging. These issues can compromise their effectiveness. If you notice any damage, consider replacing the bulb or the entire headlight assembly.
- Check Alignment: Misaligned headlights can reduce visibility and cause glare for other drivers. Ensure that your headlights are properly aligned to maximize their effectiveness. If you notice uneven light distribution, consult your vehicle’s manual for adjustment instructions.
- Use Protective Covers: If you park your car outside, consider using protective covers for your headlights. This can shield them from UV rays and other environmental factors that may cause deterioration over time.
- Replace Bulbs in Pairs: When one headlight bulb burns out, it’s advisable to replace both bulbs. This ensures even brightness and prevents the need for another replacement shortly after.
- Limit Use of High Beams: While high beams are useful for visibility, excessive use can lead to quicker bulb burnout. Use them judiciously to prolong the life of your headlight bulbs.
- Check Electrical Connections: Loose or corroded connections can affect the performance of your headlights. Regularly inspect the wiring and connectors for any signs of wear or corrosion, and ensure they are secure.
- Store Properly: If you are not using your vehicle for an extended period, consider disconnecting the battery to prevent electrical drain on the headlight system. This can help maintain the integrity of your headlights.
By following these maintenance tips, you can significantly extend the life of your headlight bulbs, ensuring that they perform optimally when you need them most. Regular attention to your headlights not only enhances your driving experience but also contributes to safer road conditions for everyone.
Frequently Asked Questions
- How often should I replace my Honda Accord headlight bulb?
It’s best to replace headlight bulbs every 1-2 years, depending on usage and driving conditions. If you notice dimming or flickering, it’s time for a change!
- Can I replace the headlight bulb myself?
Absolutely! Changing the headlight bulb is a straightforward process that most people can do with a little guidance. Just follow the steps outlined in the article, and you’ll be good to go!
- What tools do I need to change the headlight bulb?
You’ll typically need gloves, a screwdriver, and the correct replacement bulb. Having these tools on hand will make the process much smoother!
- How do I know which bulb type to buy?
Check your Honda Accord’s manual or the existing bulb for specifications. This ensures you get the right type for optimal performance.
- What common mistakes should I avoid during the replacement?
Avoid touching the glass of the new bulb with your fingers, as oils can cause it to burn out quickly. Also, make sure the bulb is secured properly to avoid any future issues!
- How can I maintain my headlights for longevity?
Regularly clean your headlights and check for any signs of wear. Keeping them clear of dirt and grime will help maintain visibility and extend their lifespan!


