This article serves as a comprehensive guide on changing a headlight in a Honda Accord. It will cover the necessary tools, provide step-by-step instructions, and offer tips for maintaining your vehicle’s lighting system.
Why Change Your Headlight?
Changing your headlight is not just a matter of aesthetics; it’s a crucial aspect of road safety. Driving with a burnt-out headlight reduces visibility and increases the risk of accidents. Additionally, it can lead to legal penalties in many jurisdictions. Therefore, understanding the importance of timely headlight replacement can significantly enhance your safety on the road.
What Tools Do You Need?
Before you begin, gather the following tools to ensure a smooth headlight replacement:
- Socket wrench – for removing screws and bolts
- Flathead screwdriver – for prying off covers
- New headlight bulb – make sure it’s the correct type for your model
- Gloves – to avoid getting oils from your skin on the new bulb
Identifying the Right Headlight Bulb
Choosing the correct headlight bulb is crucial for compatibility. Refer to your Honda Accord’s owner manual or consult a local auto parts store to find the right bulb type for your specific model year.
Step-by-Step Guide to Changing the Headlight
Follow these detailed steps to change your headlight:
- Preparation: Safety First – Ensure the engine is off and the keys are removed from the ignition. Wear gloves to protect your hands and avoid touching the new bulb with bare skin.
- Removing the Old Headlight Bulb – Locate the headlight assembly under the hood. Depending on your model, you may need to remove screws or clips to access the bulb. Gently twist the bulb socket counterclockwise to release it.
- Installing the New Headlight Bulb – Insert the new bulb into the socket, ensuring it is securely in place. Twist it clockwise to lock it. Reassemble any covers or screws you removed earlier.
Common Mistakes to Avoid
Being aware of common errors can save time and prevent damage. Avoid the following mistakes:
- Using the wrong bulb type
- Touching the glass part of the new bulb
- Forgetting to secure the bulb properly
How to Test Your New Headlight
After installation, turn on your vehicle and check the new headlight. Ensure it is functioning correctly and that the beam is properly aligned. If it appears dim or misaligned, recheck the installation.
Maintaining Your Headlights
Regular maintenance can extend the lifespan of your headlights. Clean the lens with a gentle cleaner and a soft cloth to remove dirt and grime. Additionally, check the alignment periodically to ensure optimal visibility.
When to Seek Professional Help
If you encounter difficulties during the replacement process or if the new headlight does not function, it may be time to consult a professional mechanic. They can diagnose underlying electrical issues that may be affecting your headlights.
Why Change Your Headlight?
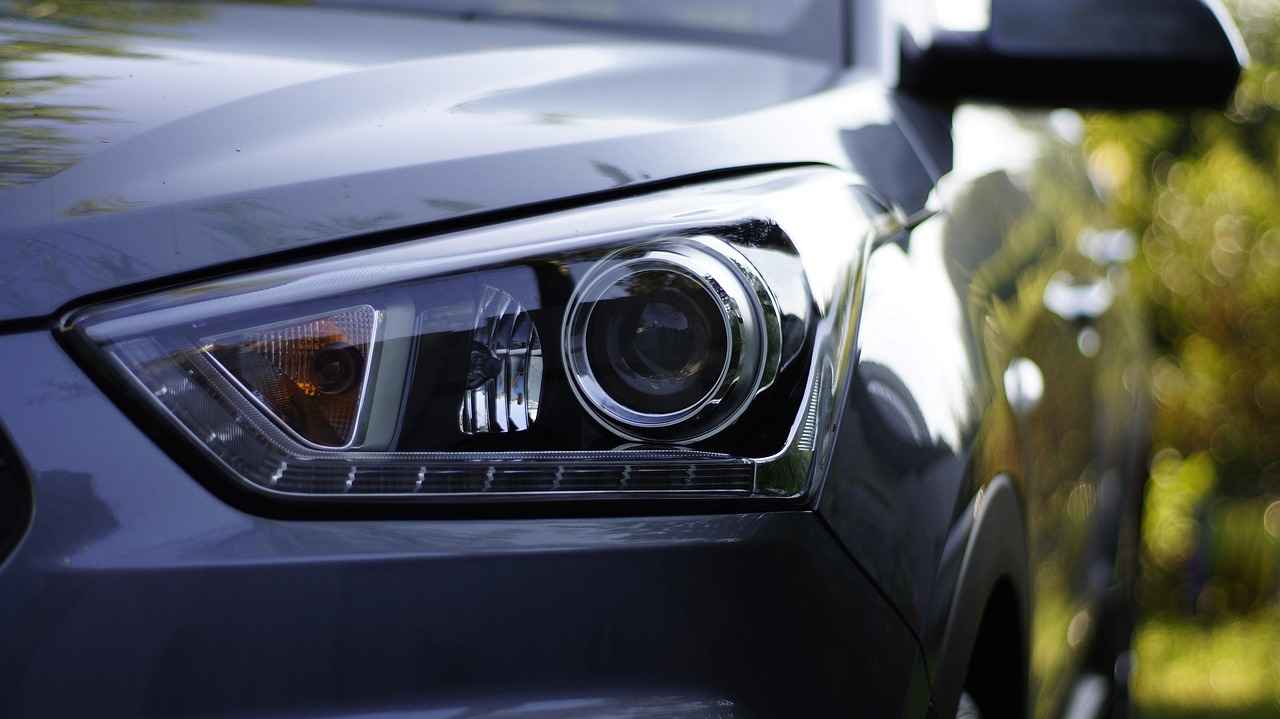
When it comes to vehicle safety, headlights play a critical role. Understanding the importance of changing headlights goes beyond mere aesthetics; it is a matter of enhancing safety and ensuring optimal visibility while driving. A functioning headlight is essential for navigating dark roads, adverse weather conditions, and even busy urban environments.
Driving with a burnt-out headlight poses several risks, not only for the driver but also for other road users. Below are some key reasons why changing your headlight is imperative:
- Reduced Visibility: A burnt-out headlight significantly diminishes your ability to see the road ahead. This can be particularly dangerous at night or during inclement weather, where visibility is already compromised.
- Increased Accident Risk: Studies have shown that vehicles with malfunctioning headlights are more likely to be involved in accidents. This is due to the inability to see pedestrians, cyclists, or other vehicles in low-light conditions.
- Legal Consequences: Many jurisdictions have laws requiring vehicles to have fully operational headlights. Driving with a burnt-out headlight can lead to traffic citations and fines.
- Impact on Other Drivers: Inadequate lighting can blind oncoming drivers, creating a hazardous situation. This not only affects your safety but also the safety of others on the road.
- Long-Term Damage: Continuing to drive with a burnt-out headlight can lead to further damage to the vehicle’s electrical system, which can result in costly repairs down the line.
It’s important to regularly inspect your headlights and replace them as needed. Many drivers may not realize that headlight bulbs have a limited lifespan and can dim over time, even if they haven’t completely burnt out. Regular checks can help ensure that your headlights are functioning at their best.
In summary, changing your headlight is not just a simple maintenance task; it is a vital aspect of vehicle safety. By prioritizing this task, you can significantly reduce the risks associated with driving in low-light conditions and ensure a safer driving experience for yourself and others.
What Tools Do You Need?
When it comes to changing a headlight on your Honda Accord, gathering the right tools is crucial for ensuring a smooth and efficient replacement process. Having the necessary tools on hand not only saves time but also minimizes the risk of damaging your vehicle’s components. Below, we will outline the essential tools and materials you will need to successfully complete this task.
To effectively change your headlight, consider the following list of tools and materials:
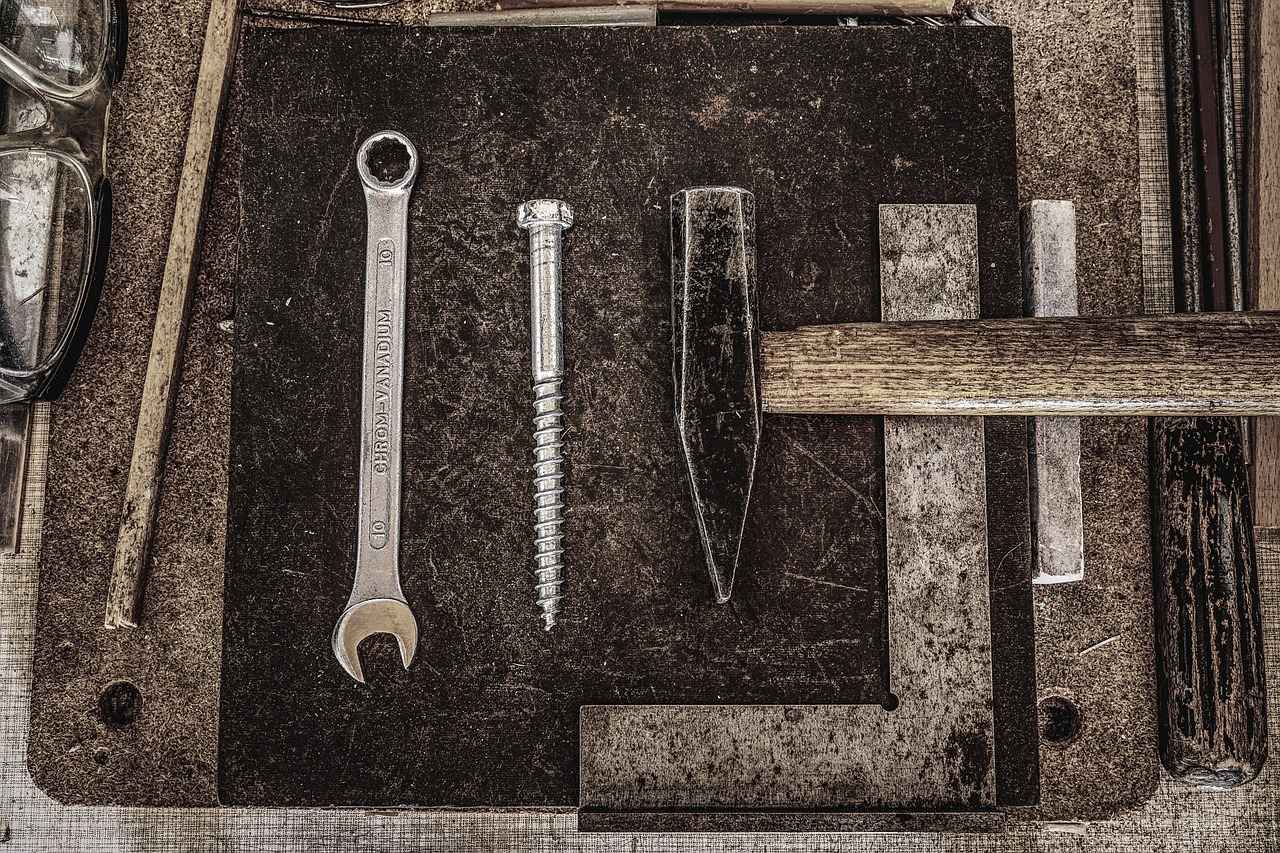
- Socket Wrench Set: A socket wrench set is essential for removing bolts and screws securely holding the headlight assembly in place. Ensure you have various socket sizes to match your specific model.
- Screwdrivers: Both Phillips and flathead screwdrivers will be necessary for different types of screws found in the headlight assembly.
- Replacement Headlight Bulb: Make sure to purchase the correct type of headlight bulb compatible with your Honda Accord. Refer to your vehicle’s manual for specifications.
- Gloves: Wearing gloves can help protect your hands from sharp edges and also prevent oil from your skin from getting on the new bulb, which can reduce its lifespan.
- Flashlight: A flashlight will be helpful for illuminating the workspace, especially if you’re working in low-light conditions.
- Safety Glasses: Protect your eyes from debris and dust while working on your vehicle.
- Cleaning Supplies: Use a clean cloth and some glass cleaner to wipe down the headlight assembly before installing the new bulb. This ensures maximum light output and visibility.
Having these tools ready before you start will streamline the process and allow you to focus on the task at hand. In addition to these tools, it’s always a good idea to have your vehicle’s manual handy, as it can provide valuable information specific to your model.
Once you have gathered all the necessary tools, you will be well-prepared to proceed with the headlight replacement. Remember, taking the time to ensure you have everything you need will lead to a more successful and less stressful experience.
By following this guide, you will not only be equipped with the right tools but also have a better understanding of the headlight replacement process, enhancing your confidence in performing vehicle maintenance.
Identifying the Right Headlight Bulb
Choosing the correct headlight bulb type is crucial for compatibility with your vehicle. In this section, we will guide you through the process of finding the right bulb for your Honda Accord model. Understanding the specifications and requirements of your vehicle will not only enhance safety but also improve visibility during nighttime driving.
Why Is Compatibility Important?
Using the wrong headlight bulb can lead to a range of issues, including poor illumination, electrical problems, and even damage to the headlight assembly. Each model year of the Honda Accord may require a different bulb type, so it’s essential to ensure you have the correct one.
How to Determine the Right Bulb Type?
- Check the Owner’s Manual: The easiest way to find the correct bulb type is to refer to your vehicle’s owner manual. It will provide detailed specifications regarding the headlight bulb type needed for your model.
- Look at the Old Bulb: If you have the old bulb, check for any markings on the bulb itself. Most bulbs have a part number printed on them, which can be used to find a matching replacement.
- Consult Online Resources: Various automotive websites and forums provide databases for headlight bulb types based on make and model. Websites like AutoZone or O’Reilly Auto Parts can be particularly useful.
Common Bulb Types for Honda Accord
Honda Accords typically use several types of bulbs depending on the model year:
| Model Year | Bulb Type |
|---|---|
| 2018-2022 | H11 |
| 2013-2017 | HID D3S |
| 2008-2012 | 9006 |
| 2003-2007 | 9005 |
Consider the Brightness and Color Temperature
When selecting a new headlight bulb, consider the brightness and color temperature. Bulbs are available in various brightness levels, typically measured in lumens. A higher lumen count means a brighter light. Additionally, color temperature is measured in Kelvin (K); for instance, a bulb rated at 6000K produces a bright white light, while one rated at 3000K emits a yellowish hue.
Consult with Experts
If you’re unsure about which bulb to choose, don’t hesitate to ask for help. Local auto parts stores often have knowledgeable staff who can assist you in identifying the right bulb for your Honda Accord. Online forums and communities can also provide valuable insights from fellow Honda owners.
In summary, identifying the right headlight bulb for your Honda Accord involves checking your owner’s manual, examining the old bulb, and considering factors like brightness and color temperature. By following these guidelines, you can ensure that you select a compatible and effective headlight bulb for your vehicle.
Step-by-Step Guide to Changing the Headlight
Changing a headlight in your Honda Accord may seem daunting, but with the right guidance, it can be a straightforward process. This step-by-step guide will walk you through each phase of the replacement, ensuring you have a clear understanding and can complete the task efficiently.
Follow these detailed instructions to change your headlight:
- Preparation: Safety First
- Ensure your vehicle is parked on a level surface and the engine is turned off.
- Engage the parking brake to prevent any movement.
- Put on safety glasses to protect your eyes from debris.
- Accessing the Headlight Assembly
Open the hood of your Honda Accord and locate the headlight assembly. Depending on your model year, you may need to remove screws or clips to gain access to the bulb.
- Removing the Old Headlight Bulb
Carefully twist the bulb socket counterclockwise to release it from the assembly. Pull the old bulb straight out, being cautious not to touch the glass part of the new bulb with your fingers, as oil from your skin can cause it to burn out prematurely.
- Installing the New Headlight Bulb
Take your new headlight bulb and insert it into the socket. Ensure it is aligned correctly and push it in firmly. Twist the socket clockwise to secure it back into the headlight assembly.
- Testing the New Headlight
Before closing the hood, turn on your vehicle and activate the headlights to ensure they are functioning properly. Check the alignment of the light beam; if necessary, adjust the headlight aim according to your vehicle’s specifications.
- Final Checks
Once you confirm that the new headlight is working, double-check that all screws or clips are reattached securely. Close the hood and dispose of the old bulb properly.
By following this step-by-step guide, you can successfully change the headlight in your Honda Accord, enhancing your visibility and safety on the road. Remember, regular maintenance of your vehicle’s lighting system is crucial for optimal performance.
If you encounter any difficulties during the process or if the new bulb does not light up, it may be time to consult a professional mechanic for further assistance.
Preparation: Safety First
When it comes to changing a headlight on your Honda Accord, ensuring safety is paramount. Before you dive into the task, there are several critical precautions that you should take to protect yourself and ensure a smooth replacement process.
First and foremost, turn off the engine. This is essential not only for your safety but also to prevent any electrical shocks or accidental activation of the headlight system while you’re working. It’s easy to forget this step, especially if you’re eager to get started, but taking a moment to ensure that the engine is off can save you from potential hazards.
Next, consider protecting your eyes. When working under the hood or near the headlights, there may be debris or sharp edges that could pose a risk to your vision. Wearing safety goggles or glasses can help shield your eyes from any unexpected particles that might fly up during the process. Additionally, if you are working in a well-lit area, the glare from the headlights can be intense, making protective eyewear even more important.
Furthermore, it is advisable to wear gloves while handling headlight bulbs. The oils from your skin can create hot spots on the bulb, leading to a shorter lifespan. Gloves not only provide a better grip but also keep the bulbs clean and free from contaminants. Make sure to choose gloves that allow for dexterity, so you can easily maneuver and connect the new bulb.
Another important tip is to have a well-organized workspace. Before you begin, gather all the necessary tools and materials in one place. This includes your new headlight bulb, a screwdriver, and any other tools you might need. Having everything at hand will minimize interruptions and help you focus on the task at hand.
Finally, consider the environment where you’re working. If it’s dark outside, use a flashlight or work light to illuminate the area. This will help you see clearly and avoid any mistakes during the replacement process. Similarly, if you’re working in a garage or driveway, ensure that the area is free from clutter to prevent any accidents.
By taking these safety precautions, you can ensure a more efficient and secure headlight replacement process. Remember, safety should always come first, and a little preparation can go a long way in avoiding mishaps.
Removing the Old Headlight Bulb
When it comes to vehicle maintenance, one of the most essential tasks is ensuring that your headlights are functioning correctly. In this section, we will focus on safely, a crucial step that sets the foundation for a successful replacement. Proper removal techniques are vital to prevent any damage to the headlight housing or surrounding components.
Removing the old headlight bulb without causing damage is paramount for several reasons:
- Protect the Housing: The headlight housing is often made of plastic, which can be easily cracked or scratched. Careful removal prevents costly repairs.
- Ensure Proper Fit: A damaged housing may lead to improper fitting of the new bulb, affecting visibility and safety.
- Maintain Aesthetics: Keeping the headlight assembly in good condition preserves the overall look of your vehicle.
Follow these step-by-step instructions to safely remove the old headlight bulb:
- Prepare Your Workspace: Park your vehicle on a level surface and turn off the engine. Allow the headlights to cool down if they were recently used.
- Access the Headlight Assembly: Open the hood and locate the headlight assembly. Depending on your Honda Accord model, you may need to remove screws or clips to access the bulb.
- Disconnect the Power Connector: Gently twist or pull the power connector to detach it from the bulb. Be careful not to tug too hard, as this could damage the wiring.
- Remove the Bulb: Depending on your headlight design, either twist the bulb counterclockwise or release any clips holding it in place. Carefully pull the bulb straight out of the socket.
- Inspect the Housing: Before inserting the new bulb, take a moment to inspect the housing for any signs of damage or debris. Clean the area gently with a soft cloth if necessary.
Here are some valuable tips to ensure you avoid damaging the headlight housing during the removal process:
- Wear Gloves: Using gloves prevents oils from your skin from transferring to the new bulb, which can cause it to burn out prematurely.
- Handle with Care: Always handle the bulb by its base, avoiding contact with the glass portion to prevent breakage.
- Follow Manufacturer Instructions: Refer to your vehicle’s owner manual for specific instructions related to your model.
By following these guidelines, you can safely remove the old headlight bulb without damaging the housing. This careful approach not only ensures a smooth transition to the new bulb but also helps maintain the integrity of your vehicle’s lighting system.
Installing the New Headlight Bulb
is a crucial step in ensuring your vehicle’s safety and visibility. Proper installation not only guarantees that the headlight functions effectively but also extends the lifespan of the bulb. Below, we provide a detailed guide to help you navigate this process with ease.
Before diving into the installation, ensure that you have the correct replacement bulb for your Honda Accord. Refer to your vehicle’s manual or consult an auto parts store for the right specifications. Once you have the appropriate bulb, follow these steps:
- Prepare Your Workspace: Park your vehicle on a flat surface and turn off the engine. Engage the parking brake to ensure safety during the installation process.
- Access the Headlight Assembly: Open the hood of your Honda Accord and locate the headlight assembly. Depending on the model, you may need to remove a cover or a few screws to access the bulb.
- Disconnect the Power Connector: Gently pull the power connector away from the back of the old bulb. Be cautious not to tug too hard, as this could damage the wiring.
- Remove the Old Bulb: Twist the old bulb counterclockwise to release it from the socket. Carefully pull it out, taking care not to touch the glass part with your fingers, as oils from your skin can shorten the bulb’s lifespan.
- Install the New Bulb: Take your new headlight bulb and align it with the socket. Insert it and twist it clockwise until it locks into place. Make sure it is seated securely to avoid any misalignment.
- Reconnect the Power Connector: Firmly attach the power connector back onto the new bulb. Ensure it clicks into place, indicating a secure connection.
- Test the New Headlight: Before closing the hood, turn on your vehicle’s headlights to test the new bulb. Check for proper alignment and functionality. If the headlight does not illuminate, double-check the connections and installation.
After confirming that the new headlight is working correctly, replace any covers or screws you removed earlier to secure the headlight assembly. It’s essential to ensure everything is tightly fitted to prevent moisture from entering the assembly, which could damage the bulb.
In summary, installing a new headlight bulb is a straightforward process if you follow the steps carefully. Regularly checking your headlights and replacing bulbs as needed not only enhances your safety on the road but also improves visibility for other drivers. If you encounter any issues during installation, don’t hesitate to consult a professional mechanic for assistance.
By maintaining your headlights and ensuring they are correctly installed, you can drive with confidence, knowing that you have taken the necessary steps to uphold your vehicle’s safety and performance.

Common Mistakes to Avoid
When it comes to changing a headlight on your Honda Accord, being aware of common mistakes can not only save you time but also prevent potential damage to your vehicle. This section will delve into frequent errors that DIYers make during headlight replacement and provide practical tips on how to avoid them.
Understanding the typical pitfalls in headlight replacement can enhance your overall experience and ensure that the job is done correctly. Many people underestimate the complexity of the task, leading to errors that can result in improper installation or even damage to the headlight housing.
- Using the Wrong Bulb Type: One of the most common mistakes is selecting an incompatible bulb. Always refer to your vehicle’s manual to ensure you purchase the correct bulb type.
- Neglecting to Disconnect the Battery: Failing to disconnect the car battery can lead to electrical shorts or shocks. Always prioritize safety by disconnecting the battery before starting.
- Touching the Glass of the New Bulb: Oils from your fingers can create hot spots on the bulb, leading to premature failure. Use gloves or a clean cloth to handle the new bulb.
- Improperly Securing the Bulb: If the new bulb is not securely fitted, it may not function correctly. Make sure it clicks into place and is properly aligned.
- Ignoring the Headlight Housing: Dirt and debris can accumulate in the headlight housing. Always clean the area before installation to ensure optimal performance.
To successfully replace your headlight without falling into these traps, follow these guidelines:
- Research Before You Buy: Take the time to look up the correct bulb specifications for your specific Honda Accord model.
- Prioritize Safety: Always wear safety goggles and gloves. Disconnect the battery to avoid any electrical mishaps.
- Handle Bulbs with Care: Use a clean cloth or gloves when handling new bulbs to avoid oil contamination.
- Check the Fit: After installation, double-check that the bulb is securely in place and properly aligned before closing the housing.
- Clean the Housing: Regularly inspect and clean the headlight housing to maintain clarity and performance.
By being aware of these common mistakes and following the provided tips, you can ensure a smoother headlight replacement process. Not only will this save you time, but it will also enhance your vehicle’s lighting performance, contributing to safer driving conditions.
How to Test Your New Headlight
After successfully installing a new headlight in your Honda Accord, it’s crucial to ensure that it is functioning correctly. Proper testing not only guarantees your safety on the road but also enhances visibility during nighttime driving. Below is a comprehensive guide on how to effectively test your new headlight.
- Visual Inspection: Begin with a thorough visual inspection of the headlight. Check for any signs of damage or misalignment. Ensure that the bulb is securely seated in its socket and that the lens is clean.
- Turn On the Headlights: Start your vehicle and turn on the headlights. Observe whether the new headlight illuminates properly. Both low and high beams should function without flickering.
- Check the Beam Pattern: Park your car on a level surface facing a wall or garage door. Turn on the headlights and observe the beam pattern. The light should be evenly distributed and aimed straight ahead. Adjust the alignment if necessary.
- Test the Brightness: Compare the brightness of the new headlight with the opposite headlight. If one side appears dimmer, there may be an issue with the installation or the bulb itself.
- Functionality of Additional Features: If your Honda Accord is equipped with features like daytime running lights or automatic headlights, ensure these functions operate correctly with the new bulb installed.
It’s also advisable to conduct a road test. Drive your vehicle in various conditions, including low-light environments, to assess the effectiveness of the new headlight. Pay attention to how well the headlight illuminates the road and any potential obstacles.
If you encounter any issues during these tests, double-check the installation process. Ensure that all connections are secure and that the bulb type is compatible with your vehicle model. If problems persist, consulting a professional mechanic might be necessary to diagnose any underlying electrical issues.
Regularly testing and maintaining your headlights is essential for safe driving. By ensuring they function correctly, you can enhance your visibility and reduce the risk of accidents on the road.
Maintaining Your Headlights
Maintaining your headlights is crucial for ensuring optimal visibility and safety while driving. Over time, headlights can become cloudy, dim, or even malfunction, which can significantly reduce your ability to see the road ahead. In this section, we will explore effective tips and techniques for caring for and cleaning your headlights regularly, ultimately extending their lifespan and enhancing your driving experience.
Proper maintenance of your headlights not only improves visibility but also enhances the overall safety of your vehicle. Dim or dirty headlights can lead to dangerous driving conditions, especially during nighttime or adverse weather. Regular upkeep can prevent costly replacements and ensure you are always prepared for the road ahead.
- Use the Right Cleaning Solution: Avoid harsh chemicals that can damage the lens. Instead, opt for a gentle soap solution or a specialized headlight cleaner.
- Microfiber Cloths: Always use a soft microfiber cloth to avoid scratching the surface of the headlights during cleaning.
- Regular Inspections: Check your headlights at least once a month for any signs of cloudiness or damage. Early detection can save you time and money.
If your headlights have become cloudy, you can restore them using a few simple methods:
1. Clean the surface with soap and water.2. Use sandpaper (800 to 2000 grit) to gently sand the lens.3. Apply a headlight restoration kit or a mixture of baking soda and vinegar.4. Rinse and dry thoroughly.5. Seal with a UV protectant to prevent future cloudiness.
In addition to regular cleaning, protecting your headlights is essential. Consider applying a protective sealant that can shield against UV rays and environmental contaminants. This extra layer of protection can significantly reduce the risk of damage and maintain clarity.
Despite your best maintenance efforts, headlights will eventually need to be replaced. Signs that it’s time for a replacement include:
- Flickering or Dimming: If your headlights flicker or are noticeably dim, it may indicate a failing bulb.
- Visible Damage: Cracks or severe cloudiness that cannot be restored through cleaning are clear indicators.
- Age of the Bulb: If your headlights are several years old, it may be time to consider replacing them for improved performance.
By following these maintenance tips, you can ensure that your headlights remain bright and functional for years to come. Regular care not only enhances your visibility on the road but also contributes to your overall safety while driving. Remember, well-maintained headlights are a crucial part of responsible vehicle ownership.

When to Seek Professional Help
When it comes to maintaining your vehicle, understanding when to seek professional help is essential, especially for critical components like headlights. While some headlight issues can be resolved with DIY methods, others may require the expertise of a qualified mechanic. This section will explore various scenarios where consulting a professional is advisable.
- Frequent Burnouts: If you find yourself replacing headlight bulbs regularly, it could indicate an underlying electrical issue. A mechanic can diagnose problems such as faulty wiring or a malfunctioning alternator.
- Dim or Flickering Lights: Headlights that are dim or flicker intermittently can suggest a failing bulb or issues with the vehicle’s electrical system. A professional can pinpoint the exact cause and recommend the necessary repairs.
- Moisture in the Headlight Housing: If you notice condensation or moisture inside the headlight housing, it may lead to bulb failure and corrosion. A mechanic can assess the seals and housing integrity to prevent further damage.
- Unusual Noises or Smells: Strange noises or burning smells when using your headlights can indicate serious electrical problems. Seeking immediate help is crucial to avoid potential fire hazards.
- Alignment Issues: If your headlights are misaligned, they can blind oncoming drivers or fail to illuminate the road adequately. A mechanic can adjust the alignment to ensure optimal visibility.
Modern vehicles have intricate electrical systems. If you encounter issues beyond simple bulb replacements, such as problems with the headlight switch, relay, or fuse, it’s best to consult a mechanic. They have the tools and knowledge to diagnose and repair complex issues that could compromise your vehicle’s safety.
Safety should always be a priority. If you are unsure about changing a headlight or feel uncomfortable working with your vehicle’s electrical components, seeking professional help is the best course of action. Mechanics are trained to handle these tasks safely and efficiently, reducing the risk of injury or damage to your vehicle.
In some cases, attempting DIY repairs may void your vehicle’s warranty. If your Honda Accord is still under warranty, it’s wise to consult a professional to ensure that any work done complies with the manufacturer’s guidelines. Additionally, if you have insurance coverage for mechanical issues, a professional mechanic can help document the problem and facilitate any necessary claims.
In summary, while changing a headlight can be a straightforward task for many, there are instances where professional assistance is crucial. If you experience frequent bulb burnouts, dim or flickering lights, moisture in the housing, or any unusual signs, do not hesitate to consult a qualified mechanic. Their expertise can save you time, ensure your safety, and keep your vehicle running smoothly.
Frequently Asked Questions
- How do I know if my headlight needs to be replaced?
If your headlight is dim, flickering, or completely out, it’s time for a replacement. Think of it like a candle; when it burns low, it’s time to change it out for a brighter flame!
- Can I change my headlight bulb myself?
Absolutely! Changing a headlight bulb is a DIY task that many car owners can handle. With the right tools and a bit of patience, you can do it yourself and save some cash!
- What tools do I need to change a headlight on a Honda Accord?
You’ll typically need a screwdriver, gloves to protect your hands, and the correct replacement bulb. It’s like having a toolbox for a home project; the right tools make all the difference!
- Is it safe to drive with one headlight out?
Not really! Driving with a burnt-out headlight can reduce your visibility and increase the risk of accidents. It’s like trying to walk in the dark; you’re bound to trip over something!
- How often should I check my headlights?
It’s wise to check your headlights regularly, especially before long trips or seasonal changes. Think of it as a routine health check-up for your car; prevention is key!
